Message Monitor tells you which recipients opened your HTML mail messages. This is done by listening for the recipient's email reader making a request for a very small, unnoticeable image inserted into the HTML message during delivery. Therefore if some of your recipients have turned on an option in their email reader to not download images, then their messages will not be detected by Message Monitor.
The Message Monitor is controlled via commands in the Mailings menu. These commands are as follows:
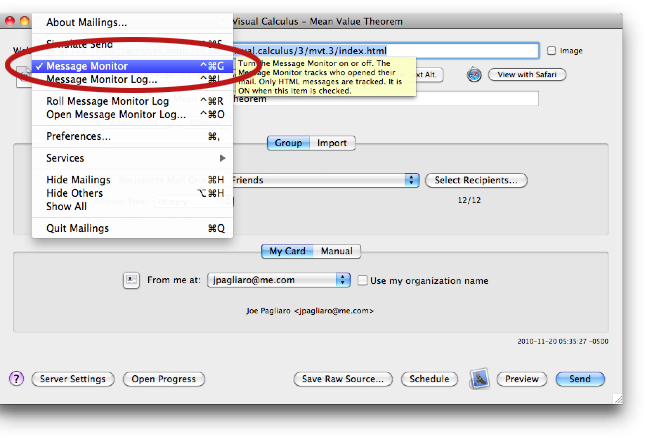
• Message Monitor: Turn the Message Monitor on or off. The Message Monitor tracks who opened their mail. Only HTML messages are tracked. It is ON when this item is checked.
• Message Monitor Log: Open the Message Monitor window to see which recipients have opened their mail.
• Roll Message Monitor Log: When a log is rolled it is closed and renamed. Then a new, empty log is opened.
• Open Message Monitor Log: Switch between log files by opening a previous log file. Opening another log file will close the current log file.
Note that Message Monitor only works with HTML based mail, so it works with Mail Stationery. Message Monitor requires that Mailings runs on a computer that can be accessed from the internet. For a machine on a LAN this can be accomplished by opening up a port on your router to point to the machine running Mailings. You can also use services such as dyndns.com to forward a domain name to your dynamic IP address.
The current displayed in te Message Monitor window can be saved to a CSV ("comma separated values") text file. Use the "Export to CSV" button in the log window to do so. The extension of the file is "txt" but you may nee to change that to "csv" for import into certain other applications
There are three steps for using Message Monitor
· Set the port (top)
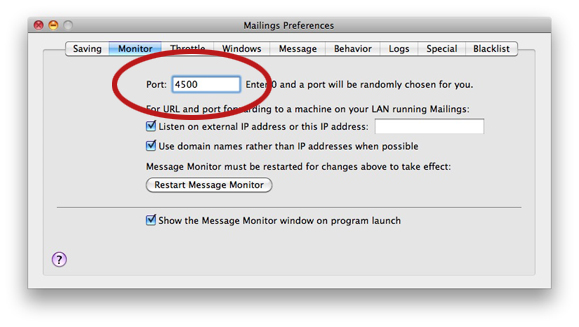
Message Monitor listens over a "port" on your computer for opened messages, and you must specify the port number so that it always uses the same port. Select "Preferences" from the Mailings menu, and then select the Monitor pane. Set the port to any number you like between 1024 and 65535 that is not in use. (You can use "netstat -a" in Terminal to find used ports. )
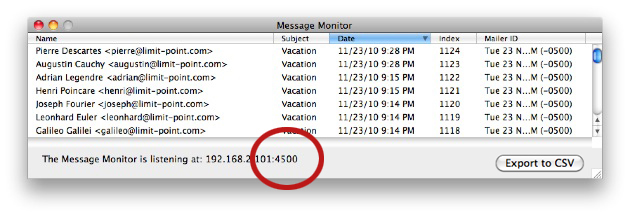
Alternatively, you can set the port to 0 and then when you turn Message Monitor on it will select a port for you. Looking at the Message Monitor log window you will know what port was available, and chosen. You can simply type that number into the port text field and Mailings will try to obtain it the next time it is launched.
So, if the automatically selected port number was 4500,
then you can enter 4500 into the port field of the Monitor pane of Preferences:
Note that this Monitor Preference pane has other options. These options enable you to run Mailings on any machine on your LAN provided you have a router forward requests for the chosen port to that machine. Preferences: Monitor for more information.
· Turn it on and send your messages (top)
It is very easy to turn Message Monitor on and off. Just select "Message Monitor" from the Mailings Menu. It is ON when that menu item has a checkmark, and off otherwise. Selecting the item toggles its state.
Now send your HTML messages as you normally would:
· Check the log (top)
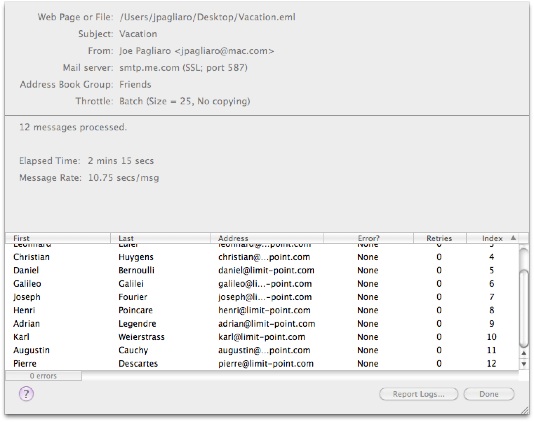
During and after the messages are delivered you can check the results with the Message Monitor log window. Select "Message Monitor Log..." from the Mailings menu, and the log window will display. The log window is updated each time a recipient opens the mail message you sent.
The Message Monitor log is stored in a persistent database, so it is always available. You can define multiple databases using the menu item "Roll Message Monitor Log" which creates a new empty log, storing the previous log under another name. All logs are always written to the same folder, namely
~/Library/Application Support/Limit Point LLC/Mailings/MessageMonitor
The current log is always named "MessageMonitor." You can open log files in this directory, i.e. switch between logs, using the menu item "Open Message Monitor Log." This presents a dialog listing the files in this directory, simply select one to switch to it.