
Panorama |
Create beautiful high-resolution panoramas.


Tips for obtaining the best results from Panorama, including the use of preference options.
Guidelines (top) |
Follow these 7 guidelines for best results:
1) Make sure images align well where they overlap.
2) You may rotate your camera to acheive better alignment.
3) All images should overlap by the same amount.
4) Distant scenes work best.
5) The "Matching Margin Size" in Preferences should at least equal, or be greater than, the actual size of the image overlaps.
6) Overlaps of at least 30% image width are best.
7) Images should have the same resolution, set to 72 dpi.
Image Acquisition (top) |
Overlap: For best results the image overlap should be the same and at least 30% of the image width (or height, for vertical panoramas.) Use our free Panorama app for iOS to acquire your images. The iOS version of Panorama has a camera with a guide to aid in taking photos with a 30% aligned overlap.
Note: "Matching Margin Size" defaults to 50% to cover overlaps, but you should adjust this value to the actual overlap percentage.
Size: Images need not be the same size, as long as they are at least as big as the matching margin size of the first image. This ensures the same size matching region can be extracted from all images.
Alignment: To aid in alignment pick specific objects to focus on. You may rotate your camera to align photos when taking pictures.
Exposure: Photos with similar exposure look better. If the exposure changes significantly between your photos use an app capable of adjusting exposure, such as iPhoto or Preview.
Scaling: You can scale very large images for faster processing (stitching or blending) or stitch sorting. Do this in the Preferences window by setting the percent to scale input images. This will affect the size of the panorama.
Alternatively, you can leave the input images the same size, and scale the "matching margin" instead.
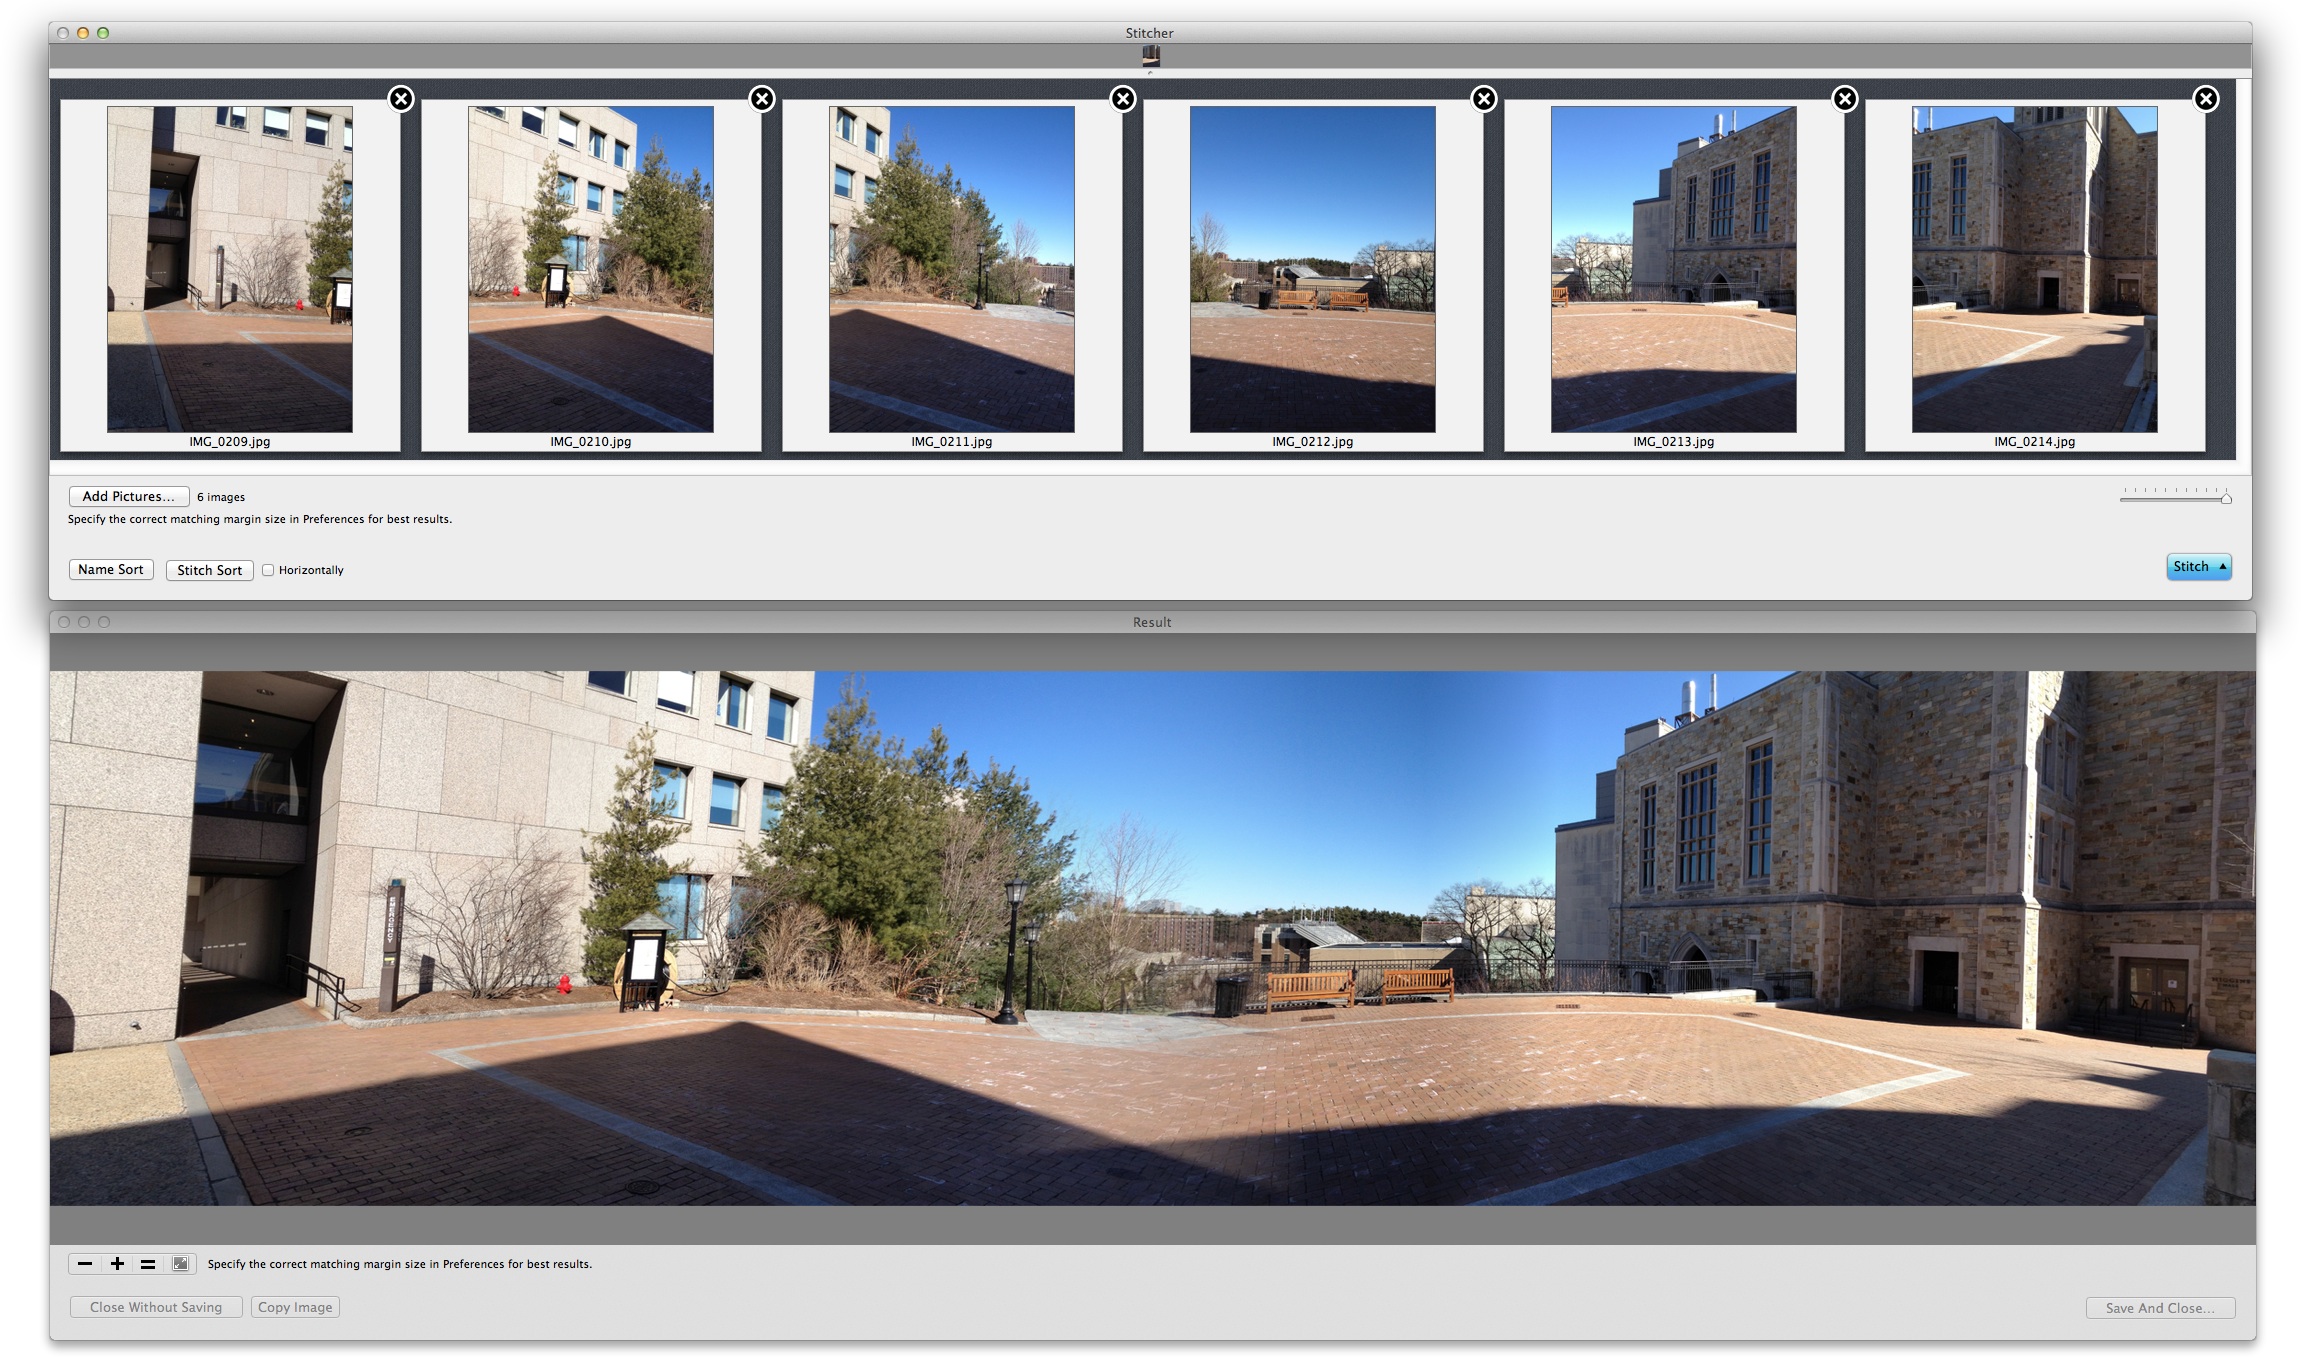
About the Stitcher (top) |
The Stitcher window is the place where you add your images to be stitched, or blended. Supports image formats jpg, tiff, png and bmp.
If the photos loaded into the Stitcher reside in the Pictures folder, Panorama will remember and reload them when the app is restarted.
At the bottom is an area called the image browser. Add images to the image browser either by dragging them in from iPhoto or your desktop or by using the "Add Pictures" button to navigate to them.
Once your images are added you can reorder them using drag and drop, or Panorama can sort them using the "Name Sort" or "Stitch Sort" buttons.
Then, from the popup menu in the "Stitch" button you can either stitch or blend the images, vertically or horizontally.
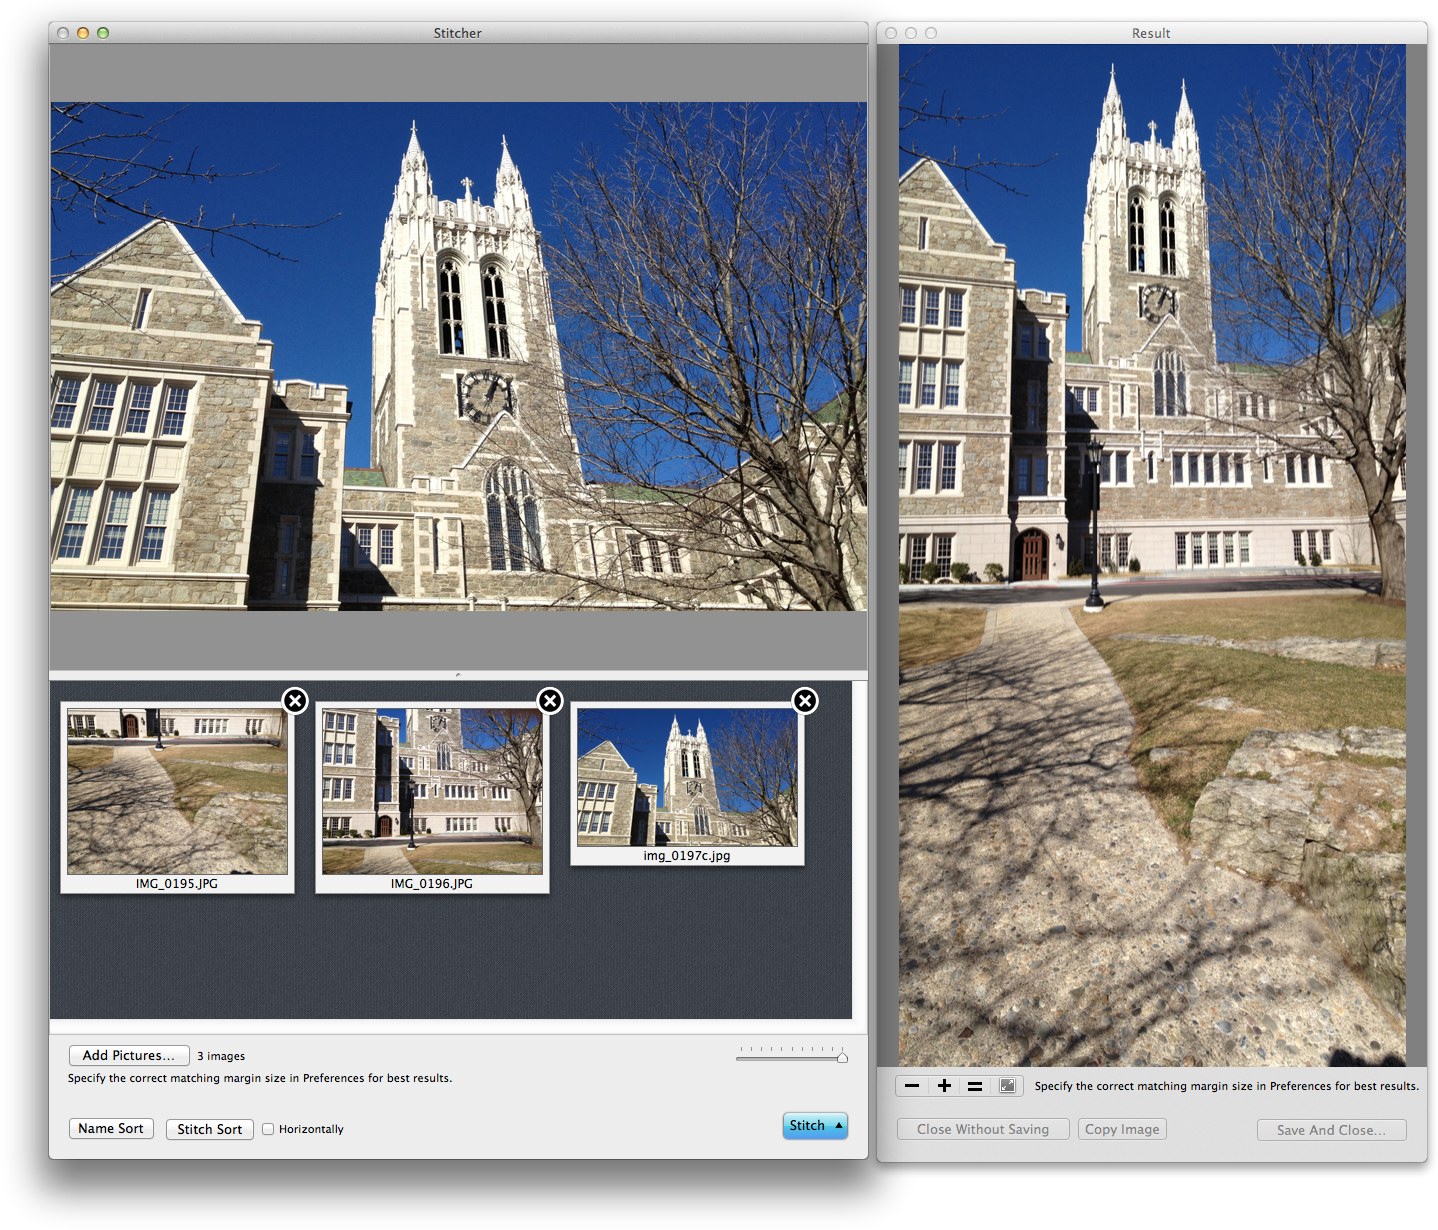
The result will always be placed in the "Result" window, where you can either save it, copy it to the clipboard or discard it. In both cases note how straight edges have no curvature in the stitch, unlike other similar products.
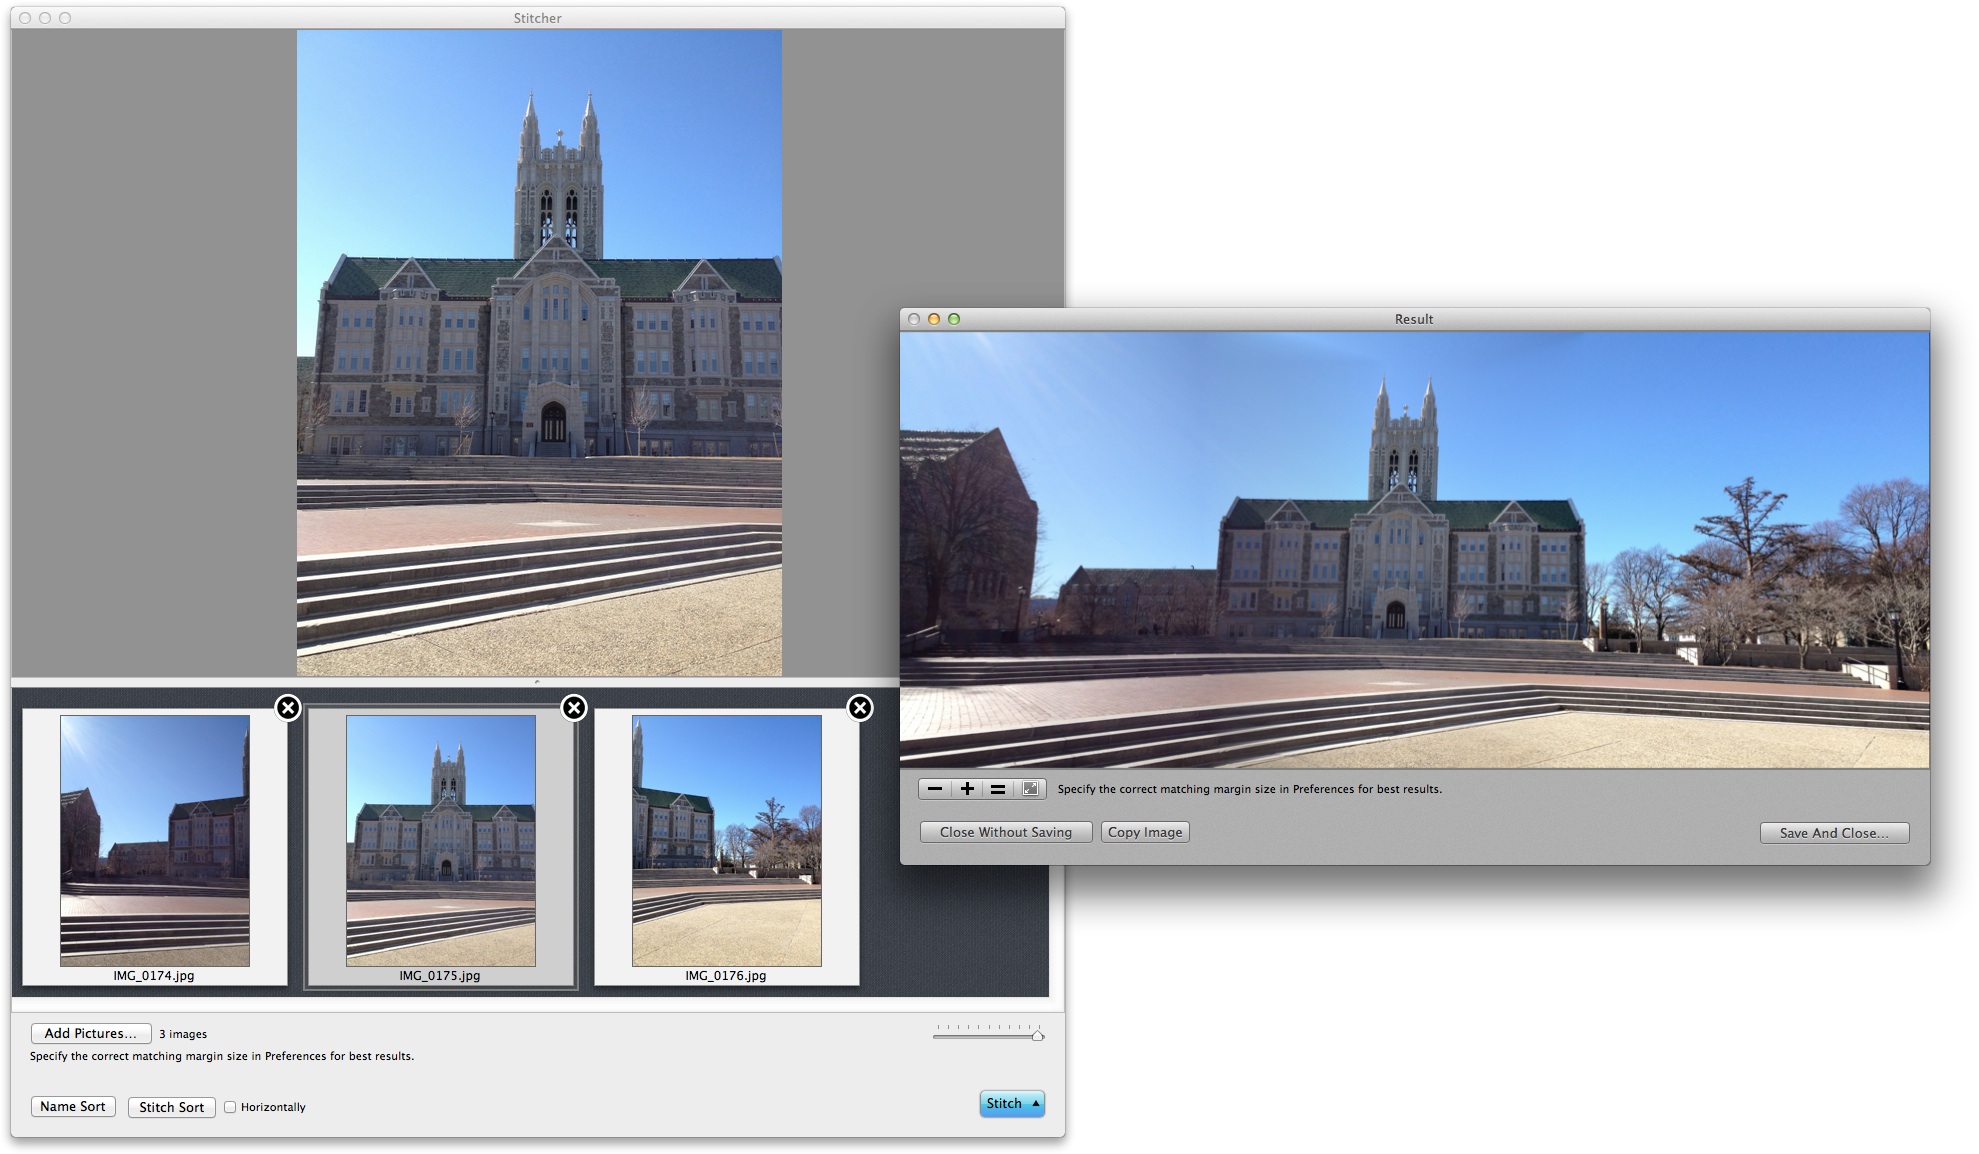
A 3 image vertical stitch:
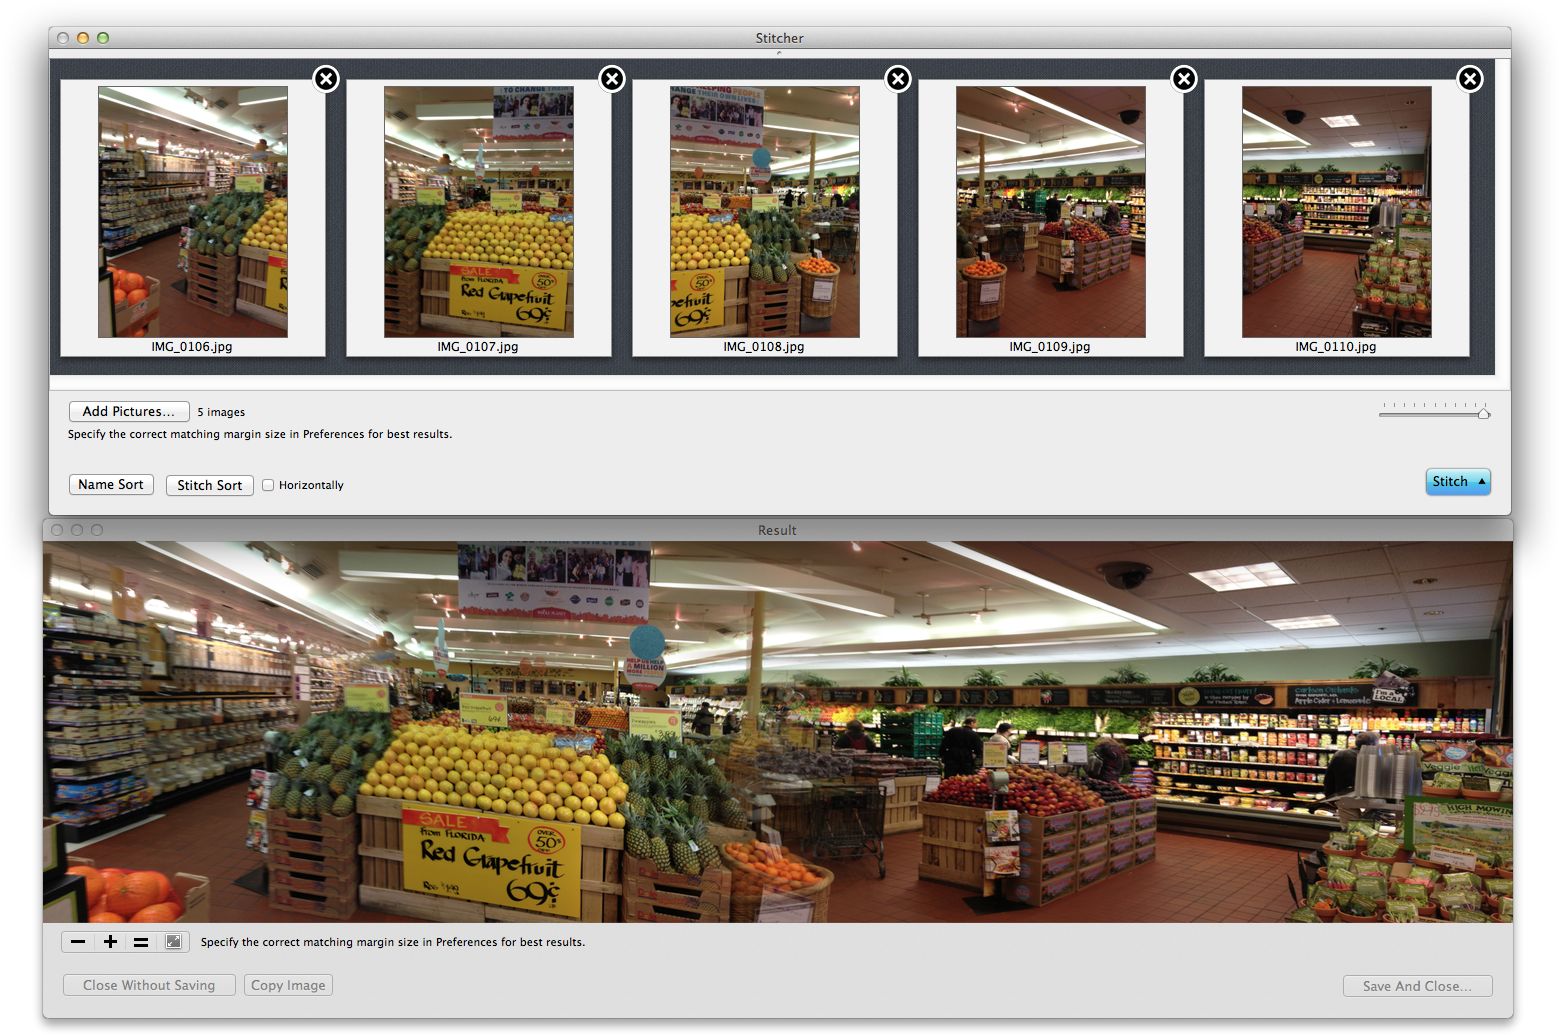
A 3 image horizontal stitch:
The stitcher is ideally suited for stitching 2 and 3 images. All stitches of more than 3 images are created by blending 2 and 3 image stitches or single images. The blend margin width is specified in preferences.
For example, a 6 image stitch is a blend of two 3 image stitches as shown here. Note the blend in the middle of the panorama. The width of the blend is determined by the "Blending Margin Width" in Preferences.
Saving Results (top) |
To import to other apps, save your results from the Result window, in various formats such as JPG, PDF, PNG or TIFF.
Or, copy your image to the clipboard in the Result window to paste it into other apps. For example, in Preview, select "New from Clipboard" to open and edit the panorama.
Preferences (top) |
Use the options in the preferences window to modify the behavior of the app for the best possible results or hasten the processing.
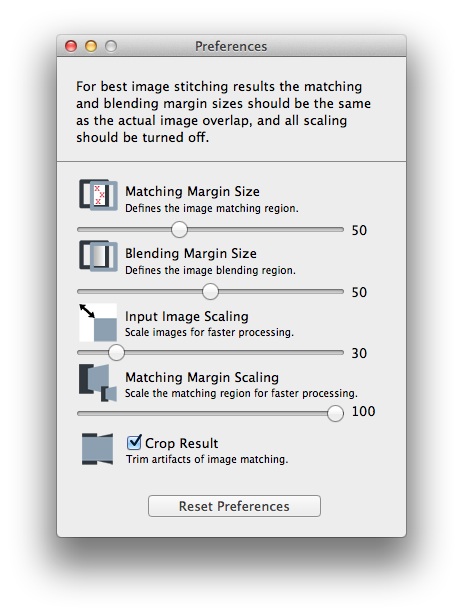
The following options are available:
![]()
Matching Margin Size. Panorama stitches by finding common features in adjacent images to register them. It looks for such features in a region of the image defined by margins along its edges.
The size of the margin is specified by this parameter, as a percent of the image width or height, for horizontal or vertical stitching, respectively.
Ideally the width (or height) of this margin will be at least the size of the actual overlap of the adjacent images.
![]()
Blending Margin Size. This margin is used for three purposes.
First: when a sufficient match between adjacent images can not be found to stitch them, they will be blended together across the margin of this size, as a percent of the image width or height, for horizontal or vertical stitching, respectively.
Second: it is used to stitch together panoramas of more than three images, as noted above - The stitcher is ideally suited for stitching 2 and 3 images. All stitches of more than 3 images are created by blending 2 and 3 image stitches or single images.
Third: when in blending mode, by choosing a blend operation from the "Stitch" popup menu in the Stitcher window, this margin defines the region over which the blending will occur.
![]()
Input Image Scaling. This option will cause all images to be scaled by the amount specified, given as a percent. Scaling images is useful to limit the size of the resultant stitched or blended image, and also to decrease processing time for very large images.
![]()
Matching Margin Scaling. This parameter will scale the matching margin to decrease processing time, specified as a percent. It will not reduce the size of the resultant image.
![]()
Crop Result. Once common features have been detected in the matching margin of adjacent images, the images will be warped to fit together. This warping will produce empty spaces in the resultant image. This option will trim off these artifacts of stitching to make a neat resultant image.
Other Options:
Exposure Matching. These settings allow you to choose how Panorama modifies the images it is processing so that their exposure is similar.
None: Don't perform any matching.
RGB: Normlize the RGB channels of each image.
HSV: Normlize the HSV channels of each image.
B+W: Use the gray scale version of each image and normailize their histograms.
Weighted. This is an option which will stretch pixel values to their full range when performing exposure matching.
Megapixel Limit. Scale down images to conserve memory and merge faster.
Use Translation. Overlap mismatched images by translation.
Blend Width. This option controls how registered images are blended together.
Decrease to reduce ghosting in overlap, increase for more gradual transitions.
Reset Preferences. Set all the above options back to their default values.
Creating Mosaics (top) |
By combining the vertical and horizontal stitchers you can create mosaics, i.e. a stitched image of a 2D array of photos.
As an example, consider this set of 4 photos taken of the setting Sun with an iPod Touch. These photos were taken by adjusting the camera so that the Sun is in the lower right, lower left, top right and top left of the photos.
In other words the Sun was used as the focal point for aligning the images.
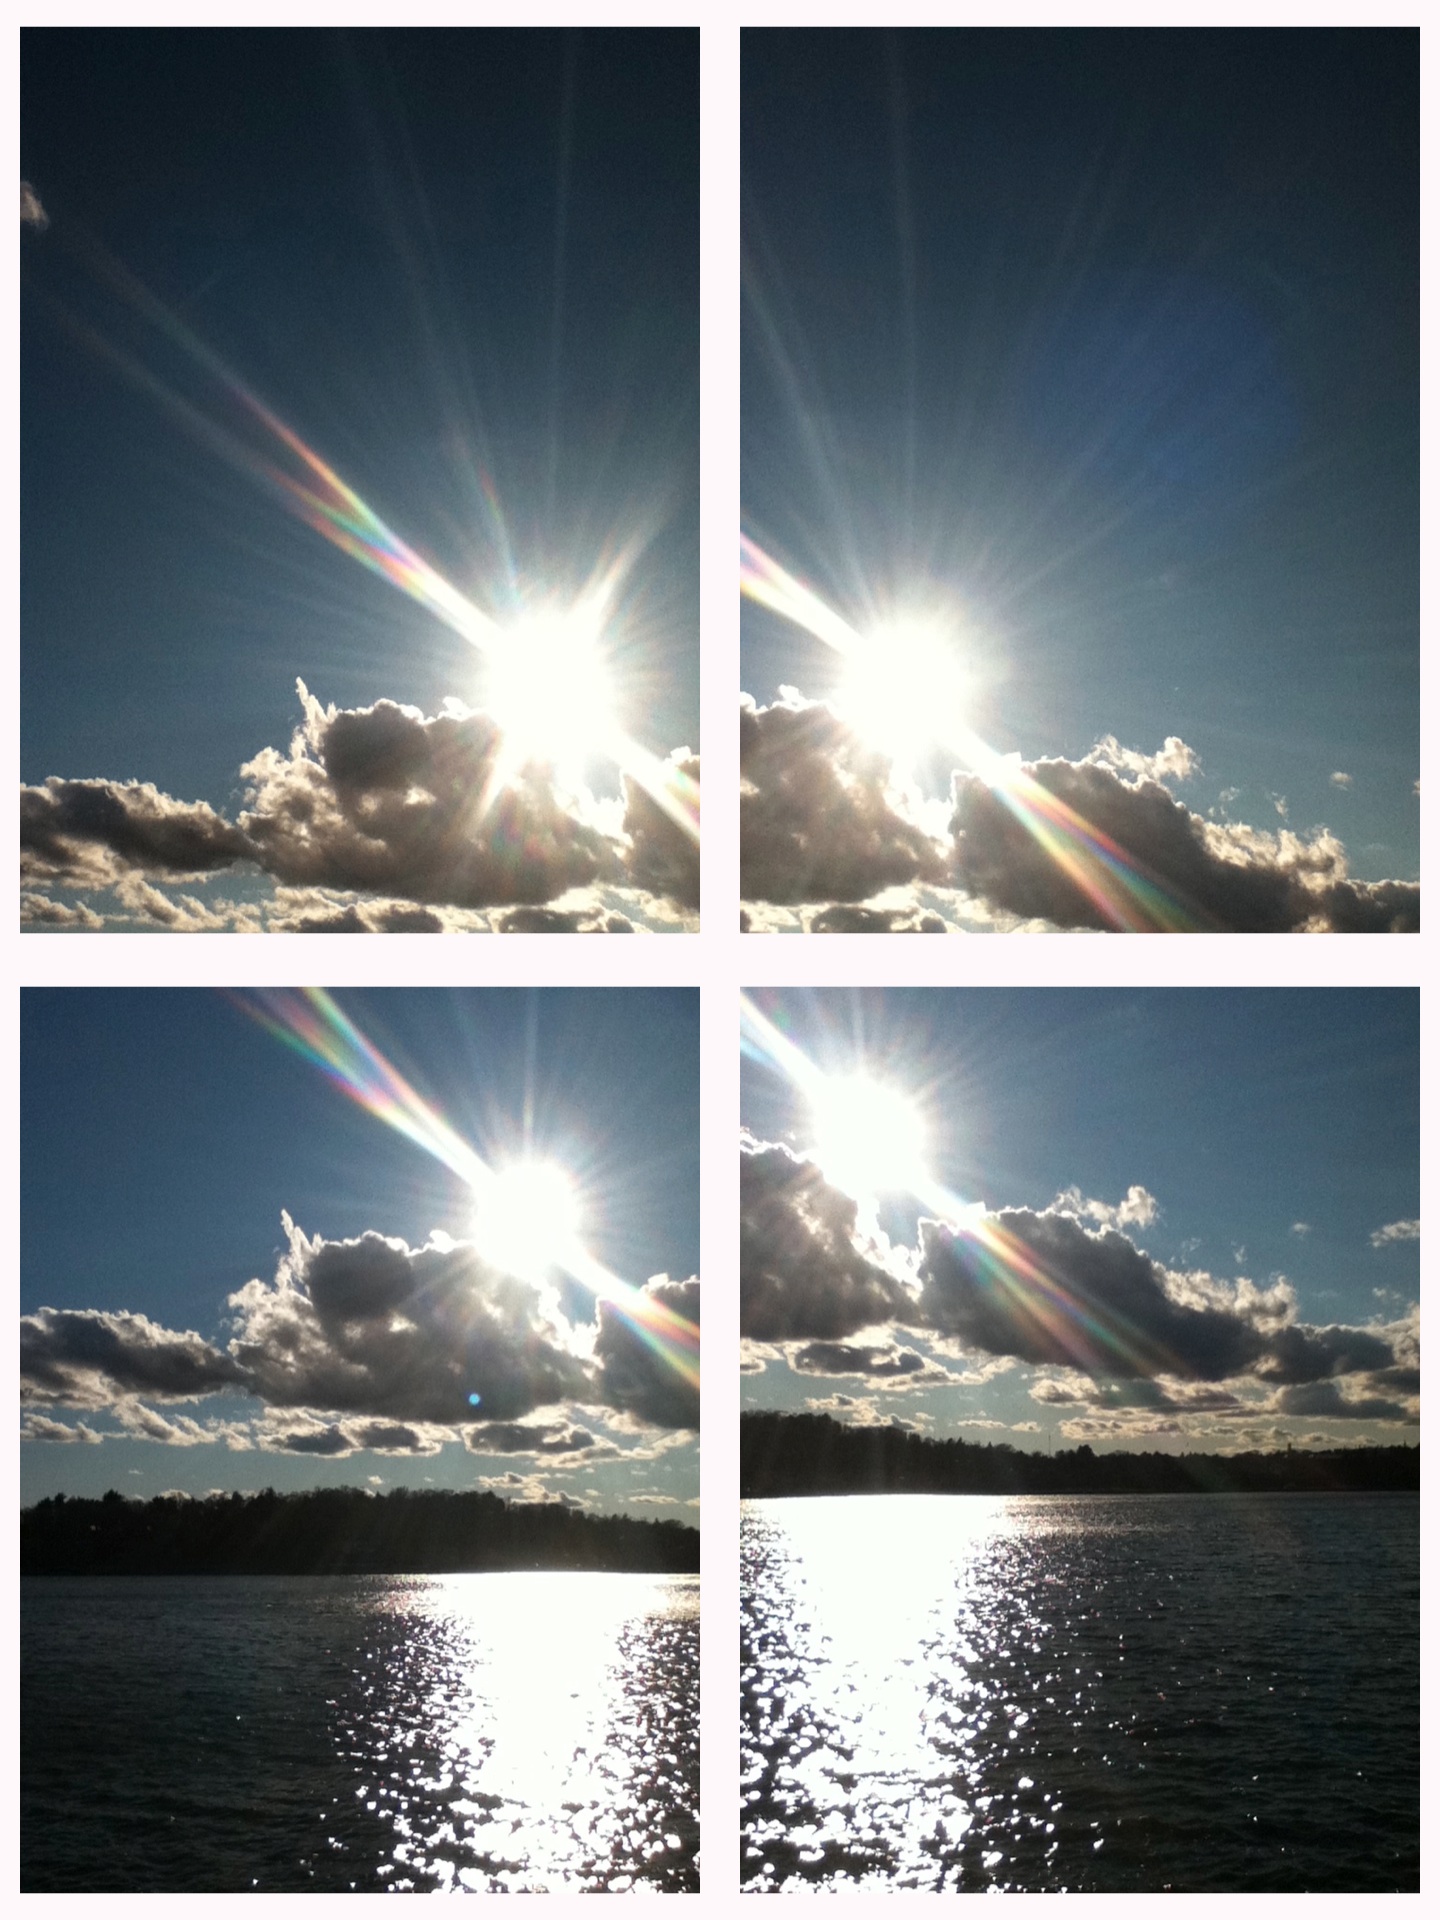
To create the mosaic, the images that form each of the two columns are stitched vertically to create two new images, one for each of the columns.
Then each of the column images are stitched horizontally to form the mosaic, as shown below.
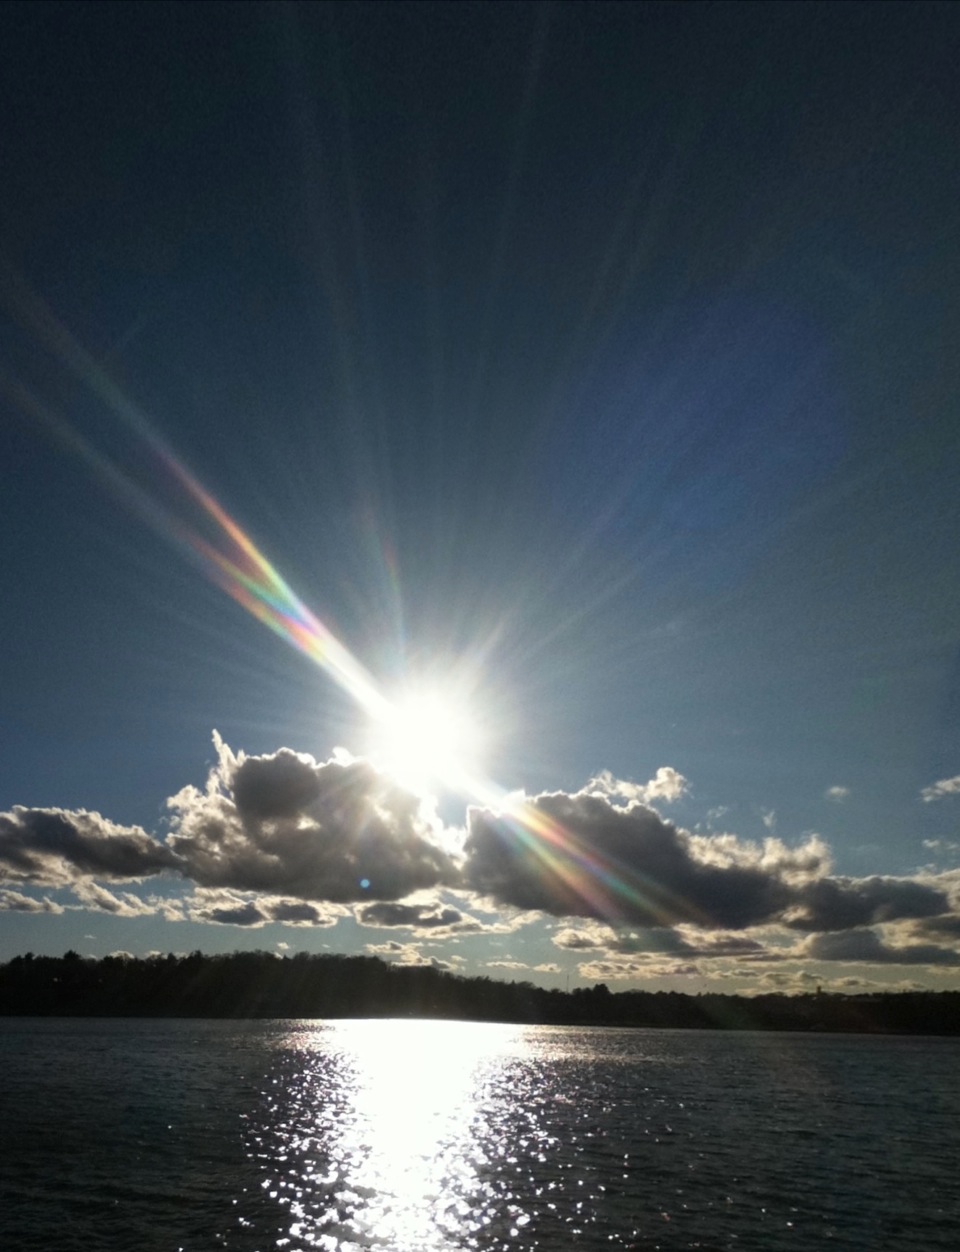
See the Gallery for a more detailed example of creating a mosaic.
Creating Photomontages (top) |
A photomontage is a collection of photos all combined into one. Panorama creates photomontages simply by blending adjacent images. The size of the blend is determined by the Blending Margin Size specified in preferences.
To create a blend, add your images to the image browser in the Stitcher window, set your blending margin in preferences, and then select a blend operation from the Stitch popup menu.
AppleScript Panorama (top) |
Panorama supports 4 AppleScript stitching and blending commands for automation. Because of this you can incorporate the functionality of Panorama into an Automator workflow (for more on AppleScript and Automator see AppleScript and Automator.)
The 4 AppleScript commands are: stitch, vertical stitch, blend and vertical blend, corresponding to the 4 menu items of the "Stitch" popup button in the Stitcher window.
Each command takes an argument named "photos" which is a list of at least two pathnames to photo files in the Pictures folder of your Home folder.
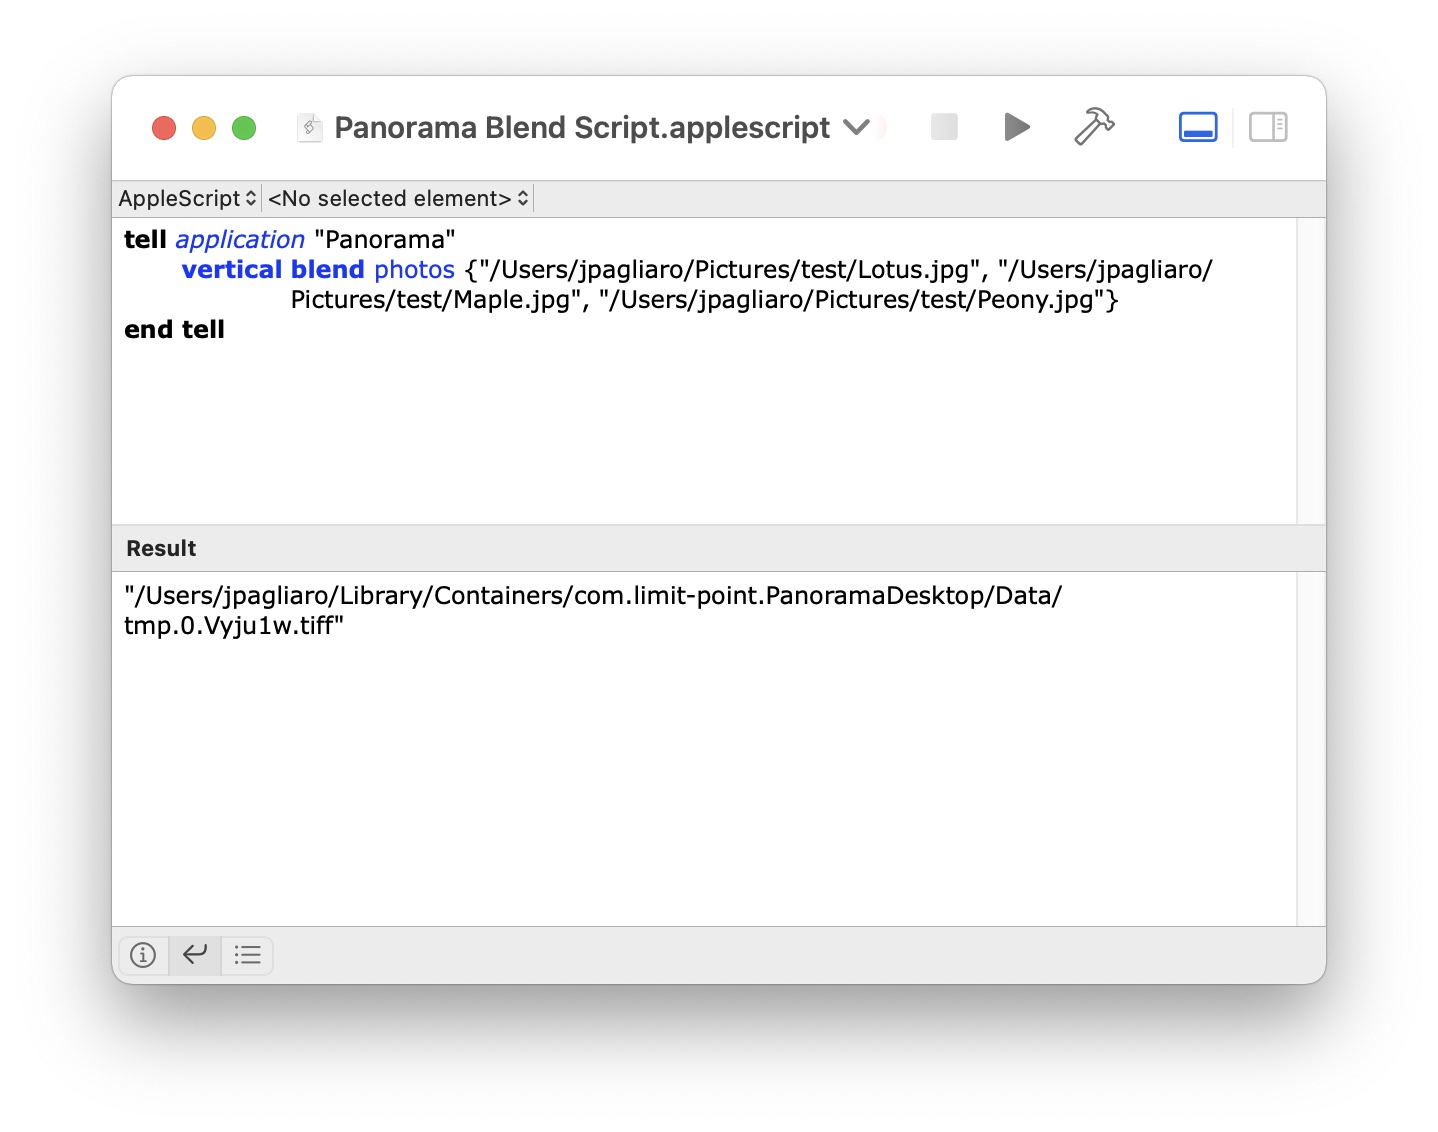
Here is a sample script:
tell application "Panorama"
	vertical blend photos
{"/Users/jpagliaro/Pictures/test/Lotus.jpg",
"/Users/jpagliaro/Pictures/test/Maple.jpg",
"/Users/jpagliaro/Pictures/test/Peony.jpg"}
end tell
Launch The Script Editor app in Utilities:
and enter the text of the script:
Make sure the files are in the proper location:

Then run the script to generate the result. The result will be the path to the generated image result, which will appear in the Result window.
Since Panorama is sandboxed it can only read pictures from the Pictures folder when running from an AppleScript.
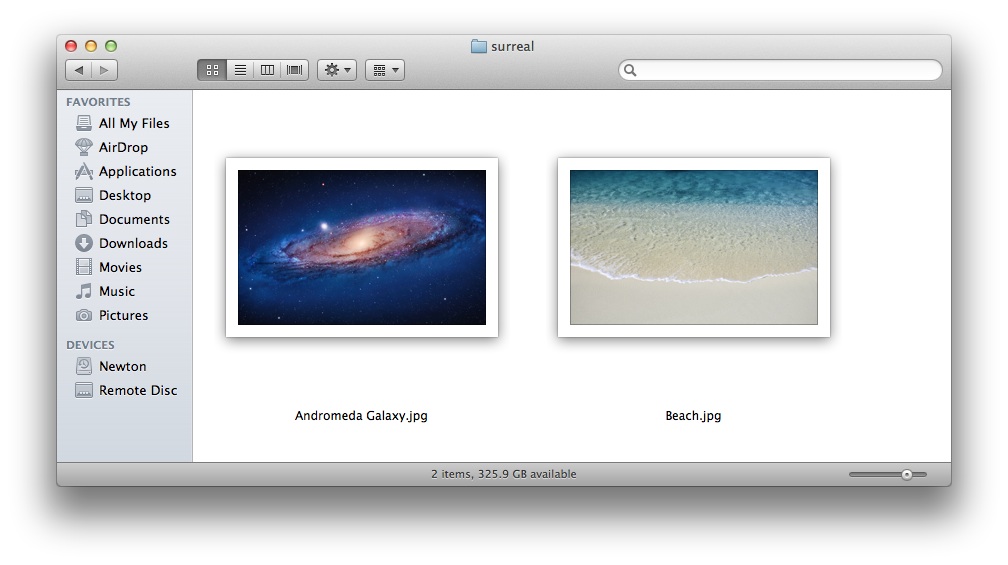
Here is an example using AppleScript to create an image named "Galaxy Beach". Click on any of the images to view them close up.

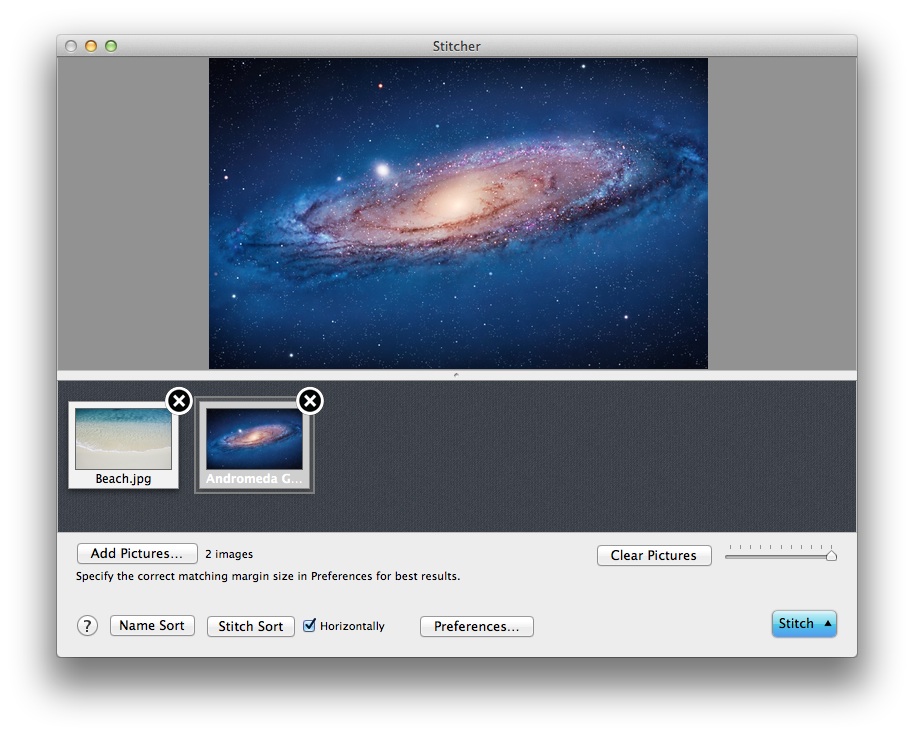
Here are the photos we want to blend with an AppleScript:
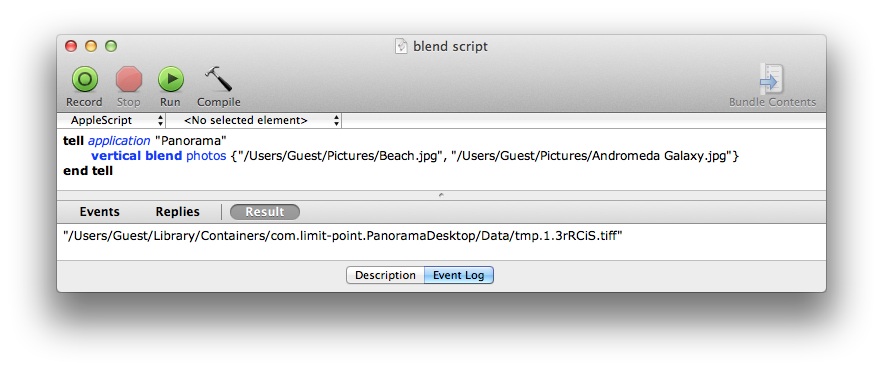
First write the script. We do this in AppleScript Editor, located in your Application Utility folder. Note that both photos are in the Pictures folder. They can also be in a subfolder of the Pictures folder.

Then we run the script. The script's result is the pathname to the stitched or blended photo.
The photos listed in the script's photos argument are automatically loaded into the Stitcher window:
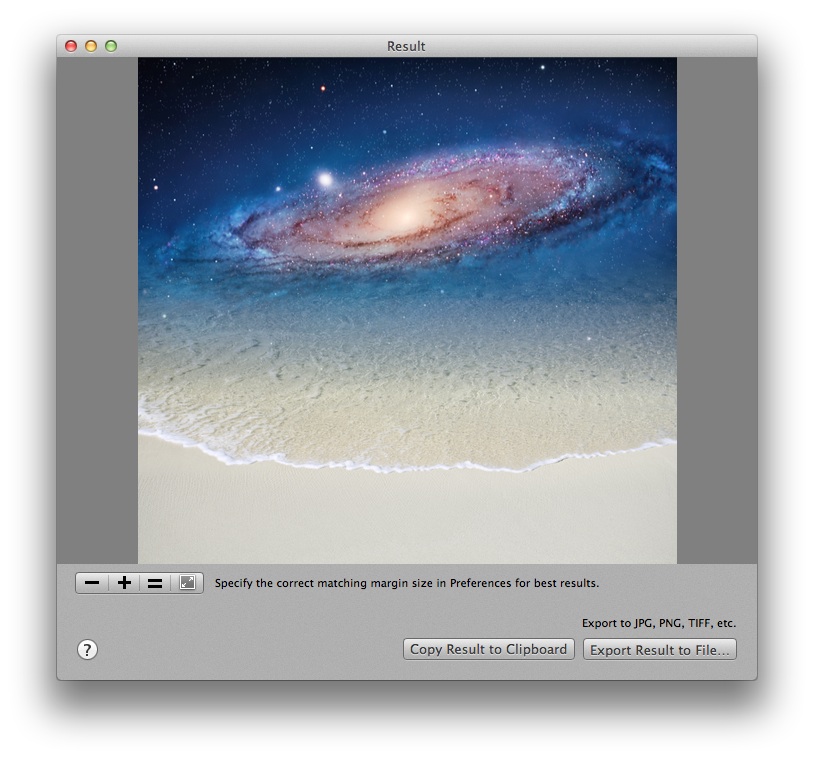
And then the stitch or blend operation procedes, placing the result into the Result window as usual:
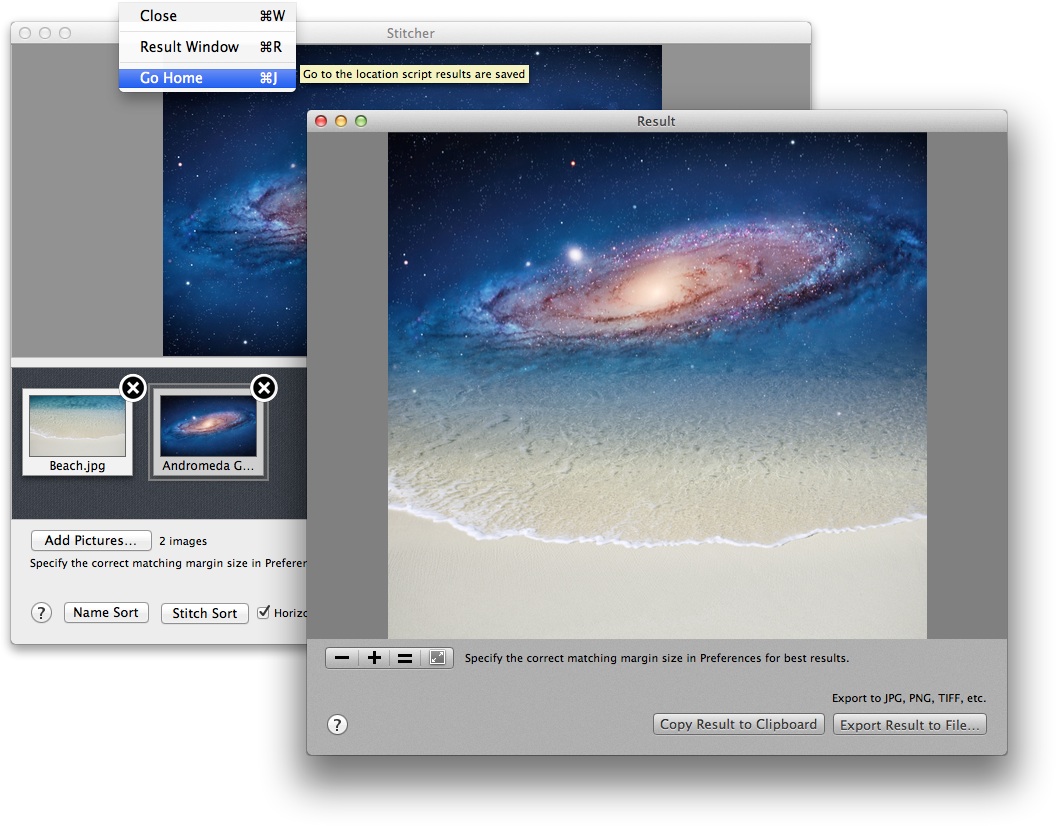
The result of the script is the pathname to the stitched or blended photo. The name is chosen randomly, and the result is placed in the data folder of the app's container.

Remember, Panorama is sandboxed, so it only has access to its own data container. It's easy to get to the data container where the result is saved. Use the "Go Home" menu item in the File menu:
Note that the result image is most likely not finished generating when the script is finished and returns the pathname. So, you should take that into consideration when scripting Panorama - your AppleScript should check for the existence of a photo file at the location returned by the script.
Finally, the image format of the result is an LZW compressed TIFF.
And that's all there is to AppleScript and Panorama!