You can import recipients in several ways: from a CSV (TSV) text file, a selection in Mail, or Entourage. When importing from text files, various forms of import files are supported. In particular Mailings supports "tagged" import files.
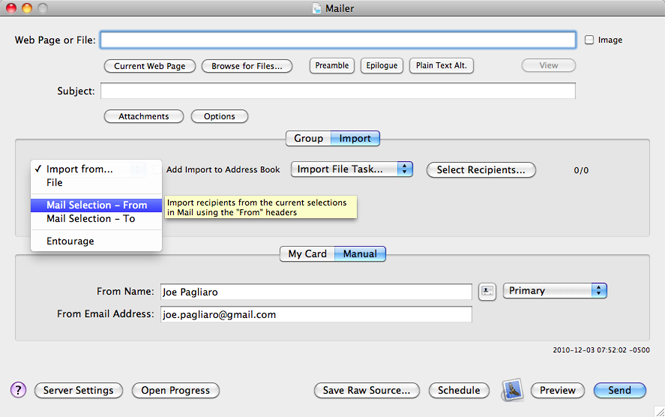
You can import recipients using a selection in Mail, either using the "From" or "To" field, of each selected message. Select either "Mail Selection - From" or "Mail Selection - To" from the "Import From..." popup menu on the "Import" tab of the Mailer window. The selection can be made in any Mail mailbox, even smart mailboxes.
To import from Entourage, launch Entourage and let it completely start up. Then select "Entourage"from the "Import From..." popup menu on the "Import" tab of the Mailer window:
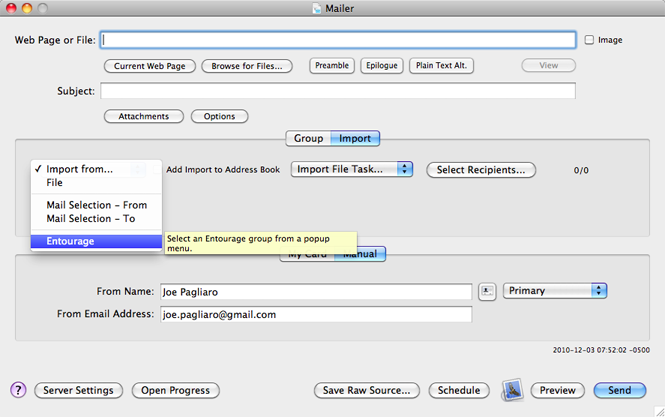
A sheet window will appear displaying a popup contain the Entourage groups you may import from:

Make a selection, and click OK.
The following "simple" text file import formats are supported. Each type shows the expected format of each line of the file of the file.
First-Last-Email: (Persons First Name)(tab or comma)(Persons Last Name)(tab or comma)(Persons email address)(carriage-return)
Name-Email: (Persons Name)(tab or comma)(Persons email address)(carriage-return)
Email-Name: (Persons email address)(tab or comma)(Persons Name)(carriage-return)
Email: (Persons email address) (carriage-return)
Mailings contains three types of message editors: Plain Text Alternative, Preamble and Epilogue. At the top of each editor window are popup menus for inserting template tags. In particular there is a popup menu that inserts tags that correspond to general mail message properties, such as the recipients first name or email address.
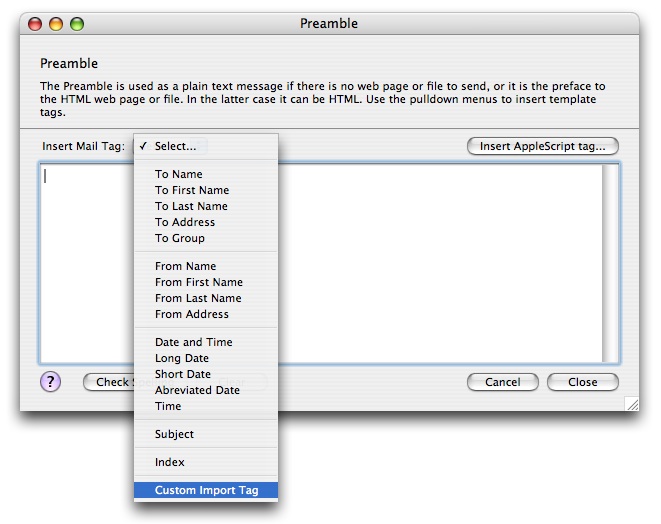
Mailings supports special template tags for accessing the values of import file fields for each recipient. To insert a tag for an import file field select "Custom Import Tag" from the Mail Tags popup menu.
For example, to create an import file with two custom fields named "Age" and "Favorite Food" add lines such as:
!!First Name Last Name Email Address Favorite Food Age
Alex Zachary alex@mac.com spaghetti 34
Erin Paul erin@mac.com hot noodles 25
The line which begins with the double exclamation is called the header and is used to name the fields of subsequent rows. The names in the header must be separated with tabs. This way the header field names may include spaces. The header line must include the "Email Address" field, and preferably the "First Name" and "Last Name" fields.
To include the "Favorite Food" value in, say, your preamble select "Custom Import Tag" from the "Insert Mail Tag" menu:
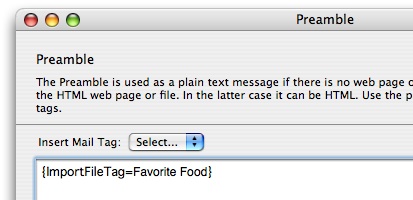
A tag of the form
{ImportFileTag=TagName}
is inserted in into the text:

Simply replace "TagName" with the name of the field requested, namely "Favorite Food" as shown:
When the tag is evaluated for the recipient "Alex Zachary" it will be replaced with "Spaghetti." When it is evaluated for "Erin Paul" it will have the value "hot noodles."
Remember that template tags may also be inserted into the message subject, web page or file, and AppleScripts which are used as template tags themselves.
The Daylite Plugin for Mailings, DayliteToMailings, enables Daylite users to send a bulk mailing to selected contacts. You can download the pliugin from the following link:
To install the plugin place the file named "DayliteToMailings.bundle" into the location:
Home > Library > Application Support > Daylite > PlugIns
(Create the "Plugins" folder if necessary.) Now relaunch the Daylite application to load the plugin.
Once Daylite is running you should see a menu item named "Send to Mailings" in the "Action" menu. After selecting recipients from Contacts choose this menu item to send their names and email addresses to Mailings. When Mailings receives the information from Daylite it creates a standard import file named
Daylite Import [Current Date-Time]
in
Home > Library > Application Support > Limit Point LLC > Mailings > PlugIns
where [Current Date-Time] is replaced by the actual current date and time the file was created. Feel free to relocate and rename the import file.
Mailings will automatically import this file and open a new Mailings mailer window displaying the "Select Recipients" sheet. At this point you can filter the imported recipients and send a bulk mailing to the selected people.